How to Install Batteries in Pride Mobility Jazzy 1103 Ultra
Wondering how to install the batteries in Pride Mobility Jazzy 1103 Ultra? Don`t worry; we have got you covered in this guide!
The Pride Mobility Jazzy 1103 Ultra Powerchair with a seat lift comes with two 35AH chargeable batteries. With proper maintenance, the batteries should last you between 6 months to 2 years. However, you should replace the battery if you find the powerchair operating at a reduced capacity. You should also consider changing the battery if it has reached the 2-year endpoint.
Thankfully, the battery can be changed easily by following a few simple steps. Just follow the guide to ensure uninterrupted travel.
Step 1: Locate the battery
The Pride Mobility Jazzy 1103 Ultra has a 5-inch seat lift and a handle. Releasing the handle will unlatch the seat from the lock position, allowing you to pull the entire scooter seat off easily. Put the seat aside, but not too far as you will notice a few cables hanging from the seat. You will need to connect the battery box to those on the seat for powering your chair.
**Make sure to turn off the power switch before starting the process**
Step 2: Find the front cover
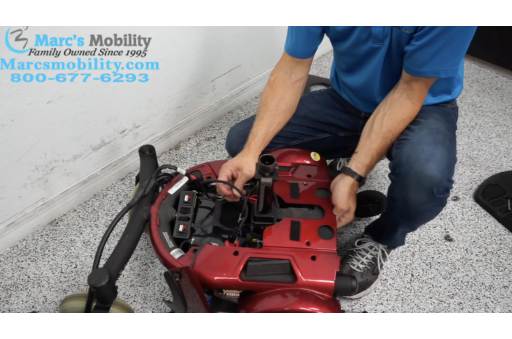
To remove the front cover (and cables), rummage at the bottom of the scooter to find a small hook. Remove the hook to loosen the front casing. Behind the casing, you will find the front cover along with the wires.
Keep the wire aside as you will need them to connect the batteries together in the latter stage.
Step 3: Find the rear battery compartment
Remove the black cover from its pole to find the rear battery compartment. If you already have an existing battery, take it out carefully to make space for the fresh ones.
**Always remember that old batteries won`t give you optimal performance. But they do contain some energy. Therefore, recycle them properly through a hazardous waste collection program to avoid fire or shock**
Step 4: Place the batteries in their space
Take out your new batteries from the box. You will receive packets of bolts along with your new batteries. Keep them separated with each battery case.
Start off by placing the back battery in its compartment. Take the battery and place it carefully in the designated area but be careful not to press down on any wires or cables. A fuse box is also present in that area. Keep it upright at the back end of the compartment.
The front battery will go upright in the front casing. Secure it using the existing belts. The casing will come with two cables: Red and Black. Remove the existing bolts on the cables with the new ones. Attach the black cable with the black connector on the battery. Ensure its connected tight using a couple of 10mm wrench.
Leave the red cable as you will attach it to the rear battery case.
Now slide the front battery case in its initial position. But make sure the fuse remains on the left side.
Step 5: Connect the front and the rear batteries
Take the red plug (from the front case) and bring it to the rear from the right side of the chair.
Now take the wires you put aside in Step 2 and extend it from the bottom of the chair. Connect the red wire to the red outlet on both the battery cases. Take the remaining black wire and plug it tightly on the black connector present in the rear battery case. You will have a black cable left for connection.
Step 6: Connect the rear fuse box with the seat
Now take the fuse box that exists in the rear side and connect with the cables on the seat you took out earlier. Match each plug with the same color. At the end, you will only have a black cable left extending from the seat.
This is the power cable. You will connect this with the pending cable (from Step 5). Ensure all plugs are tight and secure. Test your powerchair by toggling the joystick. A light on the screen indicates everything is set properly.
Step 7: Put the powerchair back together
As a last step, put back all the casing of the chair in its correct position. And with that, your Pride Mobility Jazzy 1103 Ultra is ready for use.
Watch the video here for detailed instructions. Or get in touch with Marcs Mobility for assistance. Our team will be happy to provide the support you require to enhance the performance of your powerchair.

